

health) while the Rive file handles the visuals in response (e.g. color changes, and low-health warnings).
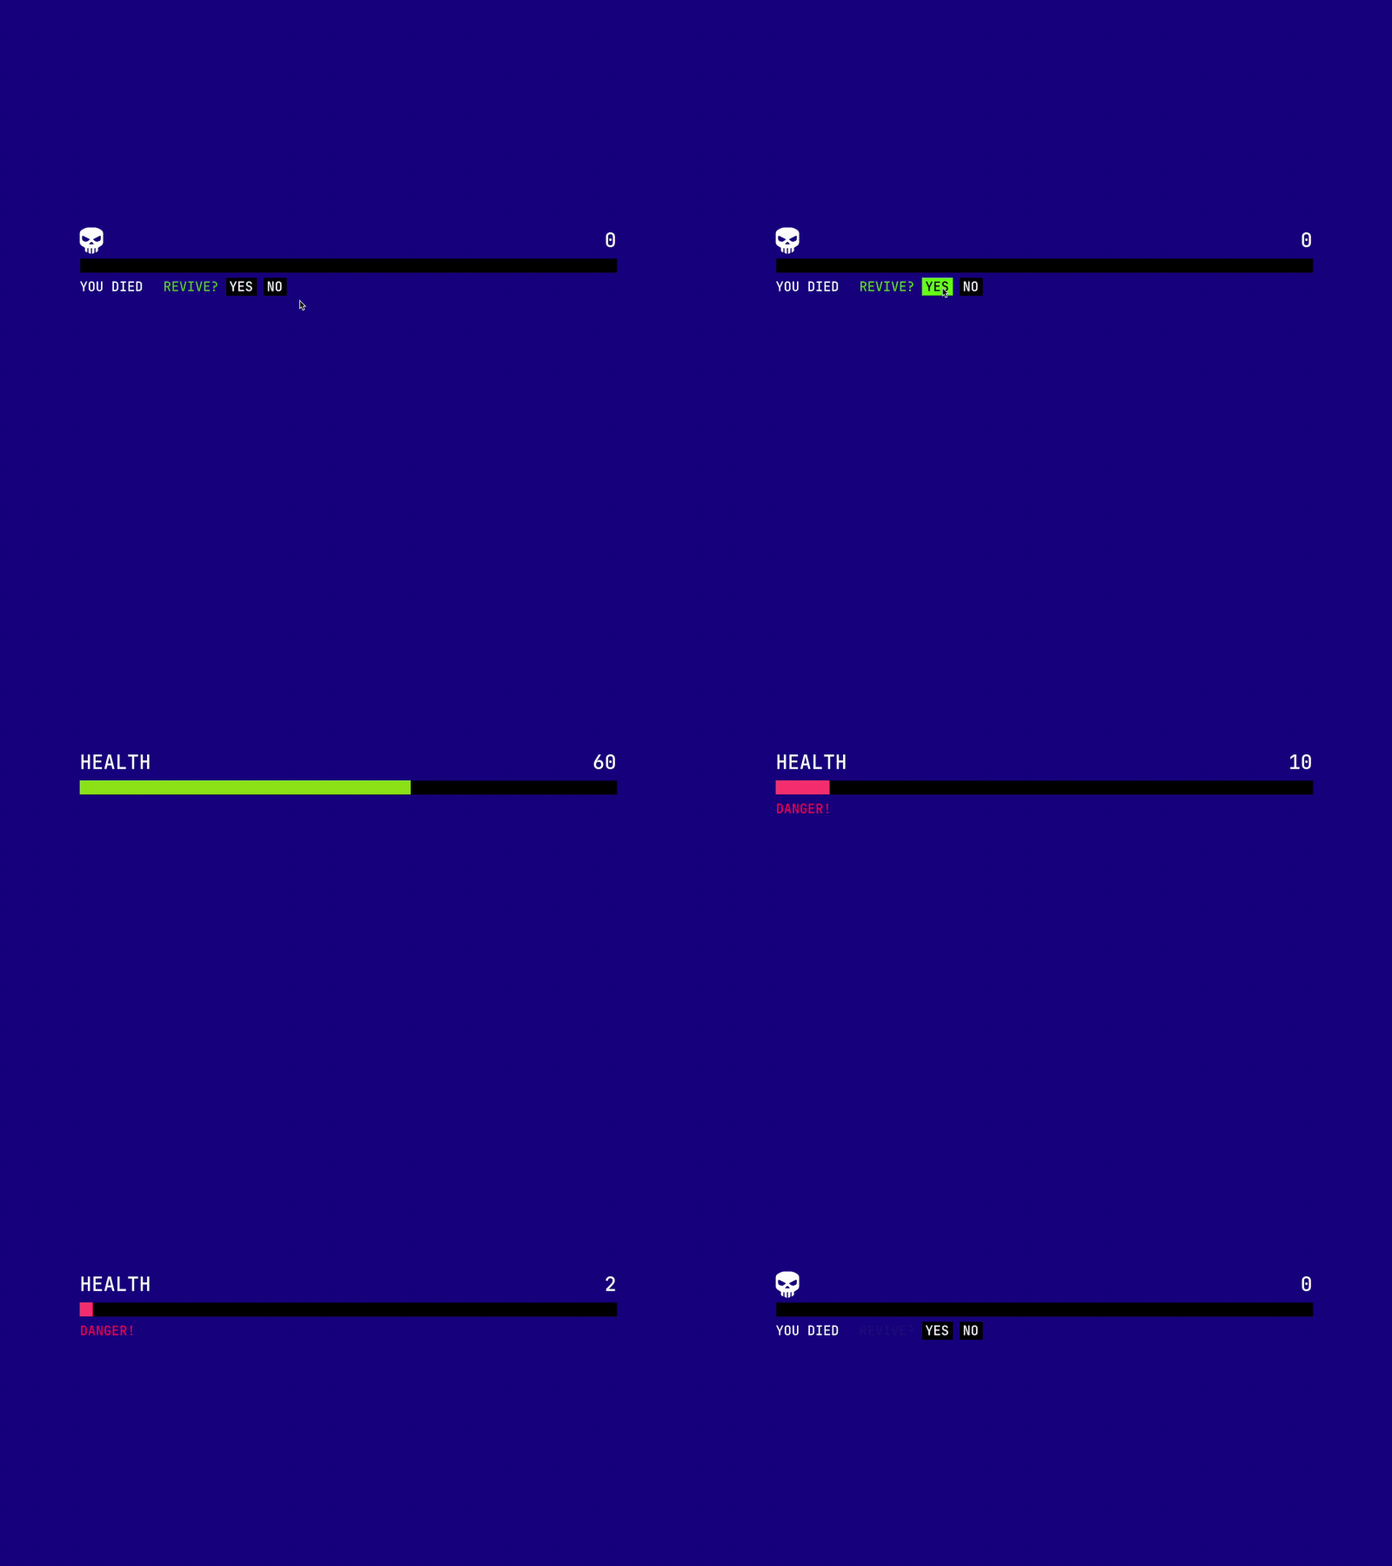
What you’ll build
- A scene that displays a Rive health bar file in screen space
- A
HealthBarControllerscript that:- Sets a
healthnumber property on the view model instance - Listens for a
gameOvertrigger fired from the Rive file
- Sets a
- (Optional) A small keyboard control script to test damage/heal
Requirements
- A Unity project with the Rive package installed (see Getting Started)
- Familiarity with view models and data binding in Rive
- A
.rivfile that exposes a view model instance with:health(Number)gameOver(Trigger)
.riv file, or click Preview in Rive to see how it was set up in the Rive Editor.
1. Import the Rive file
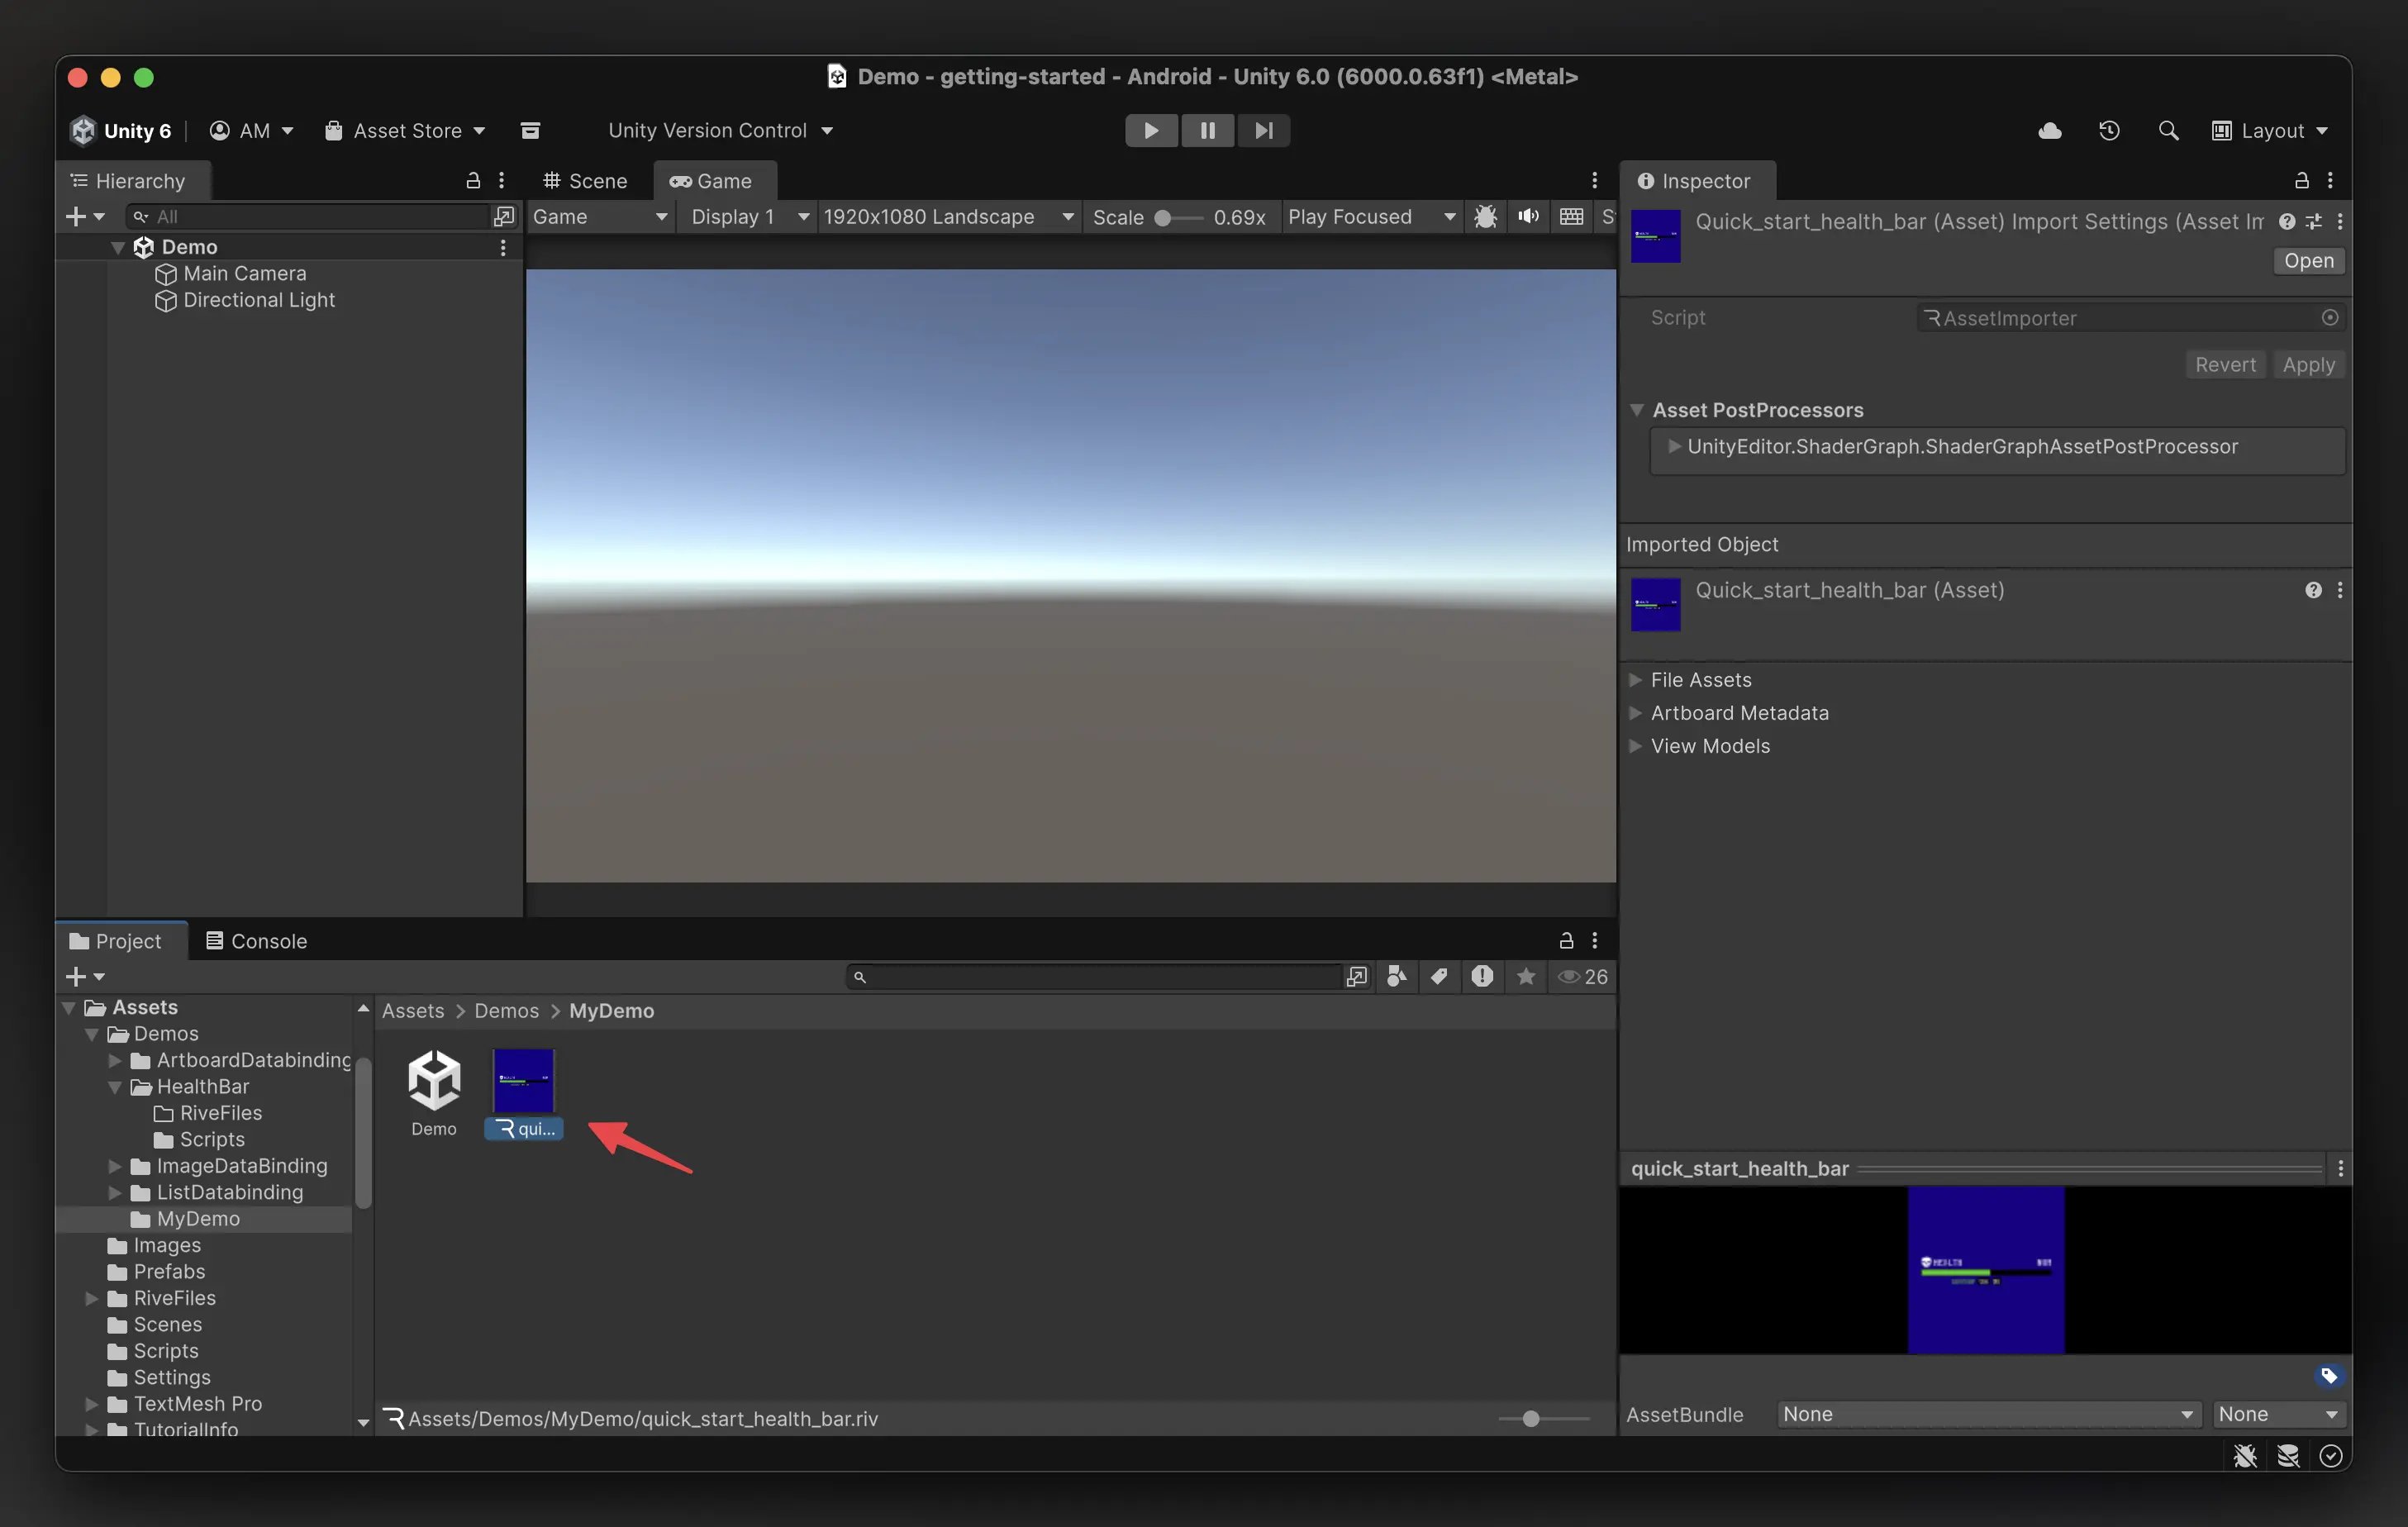
.riv file into the Unity Project window. Unity will import it and create a Rive Asset.
2. Display the Rive file in UI
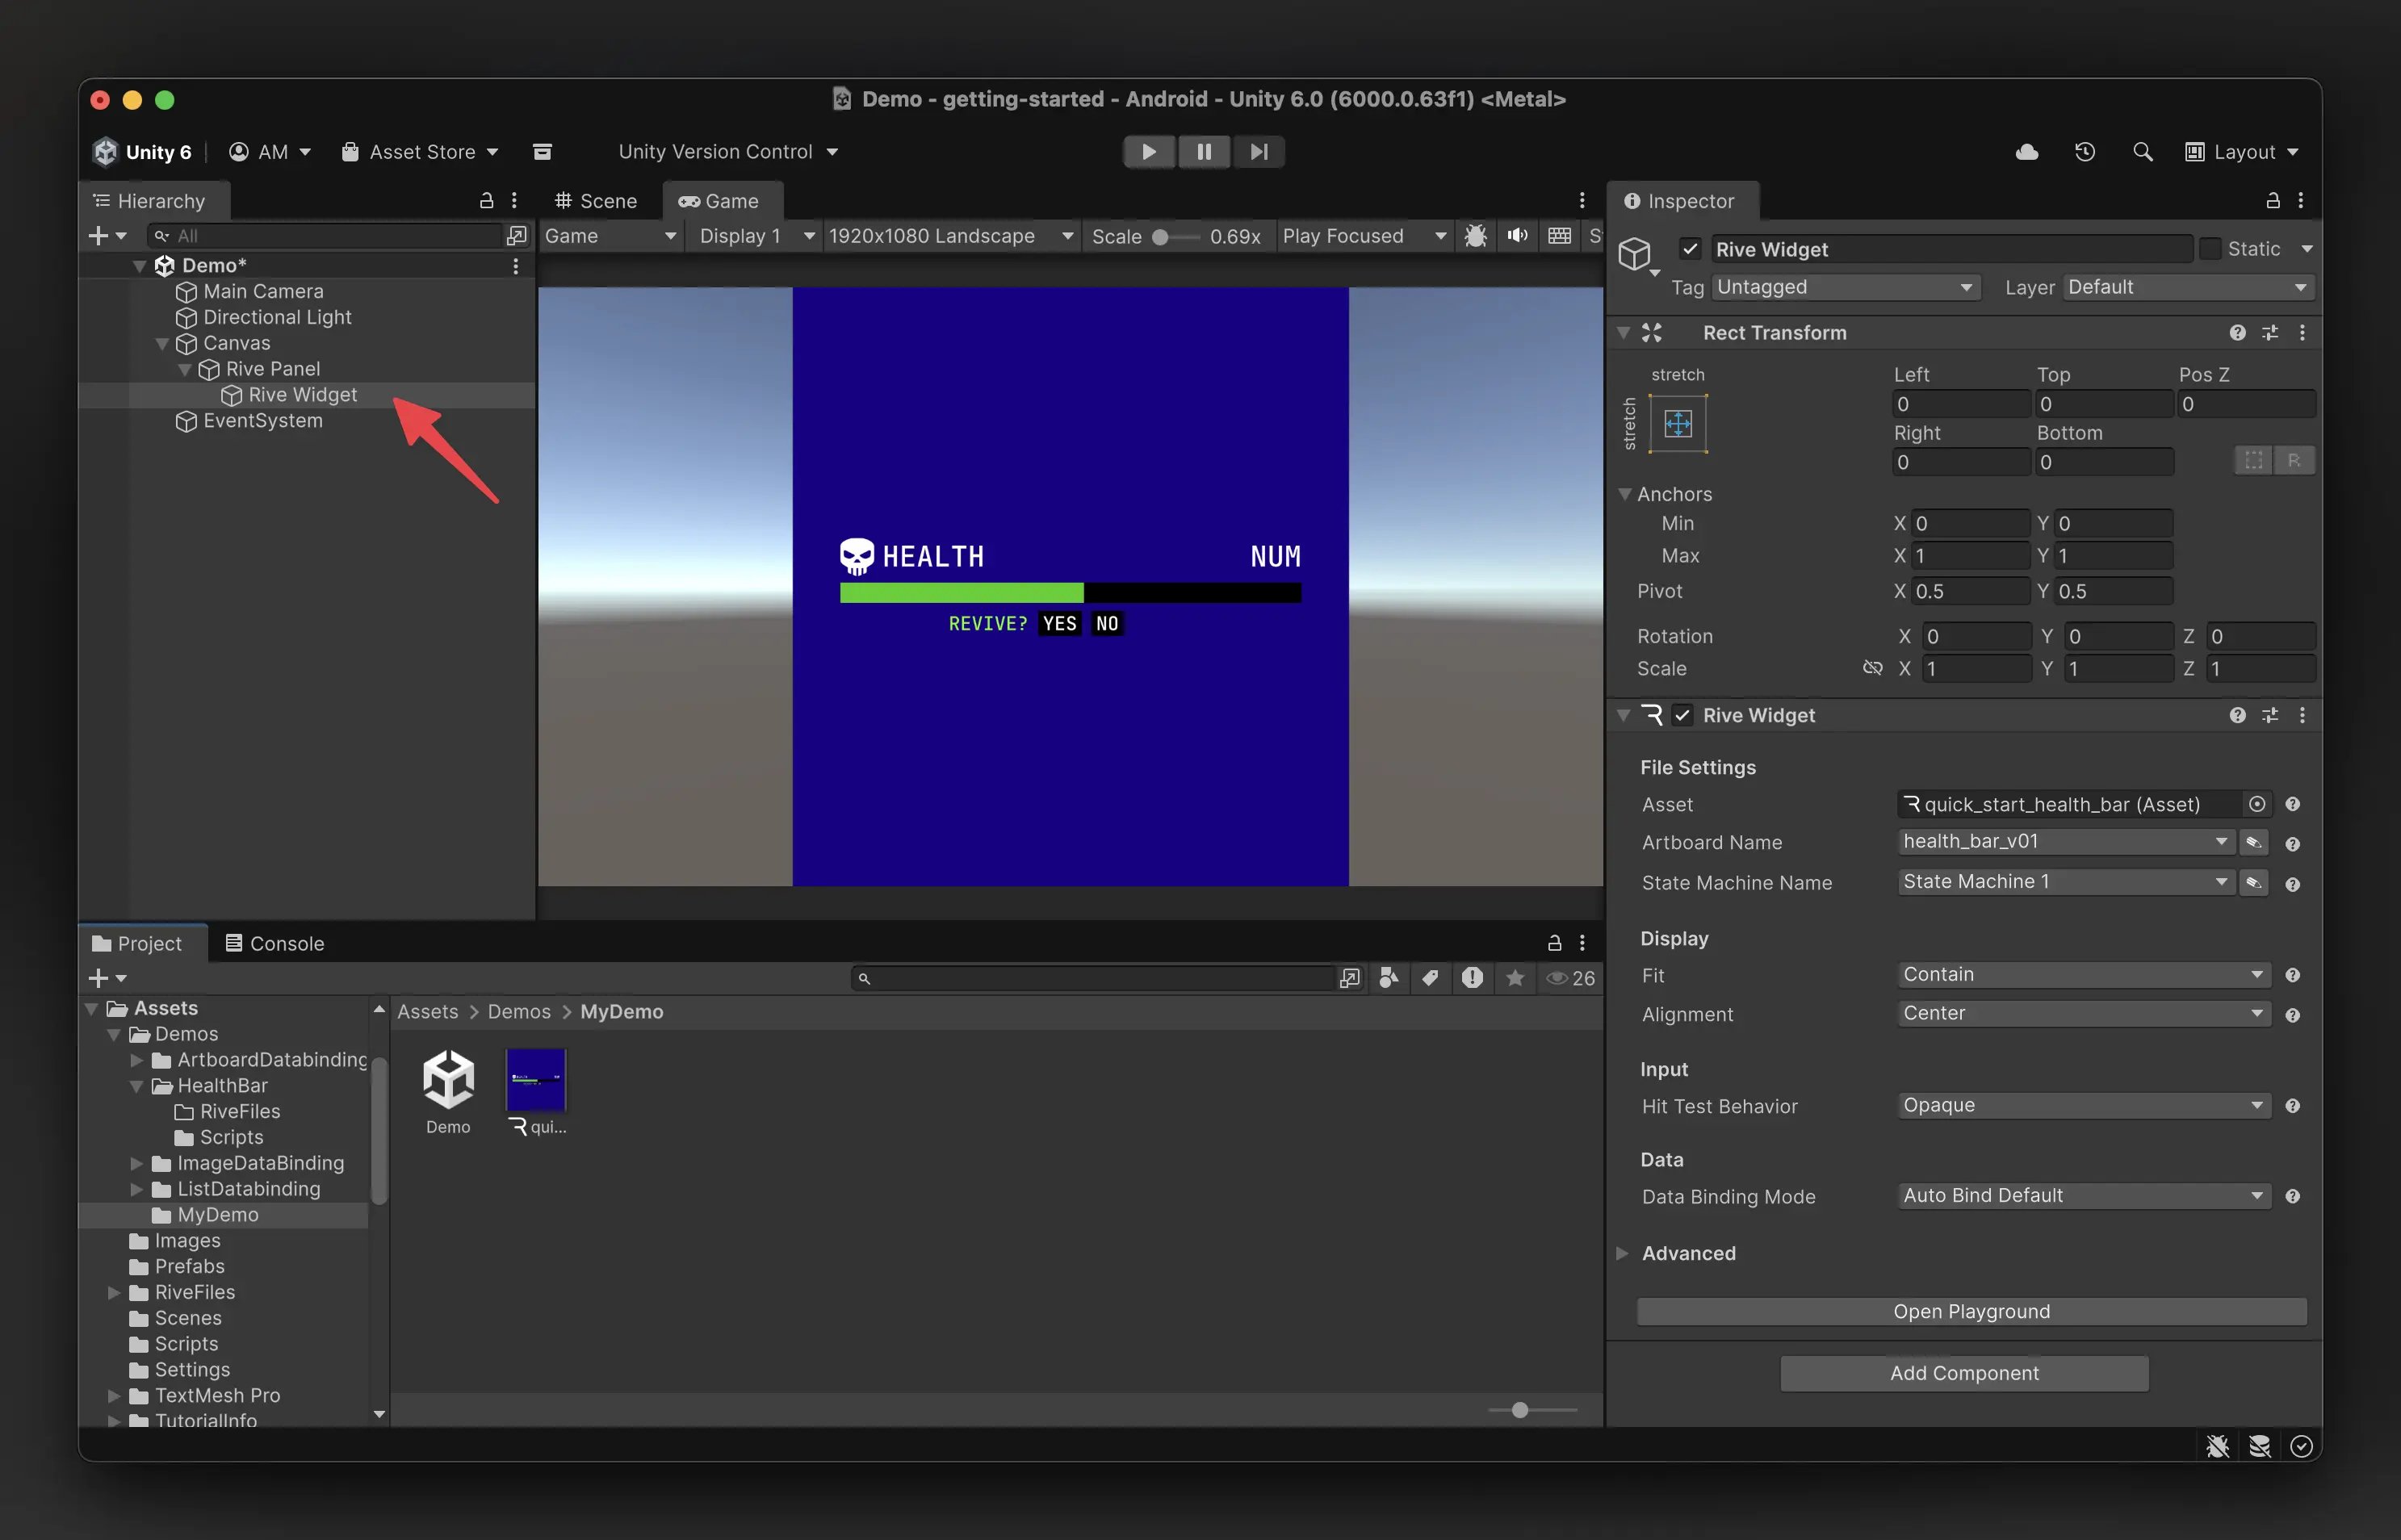
3. Configure the Rive Widget
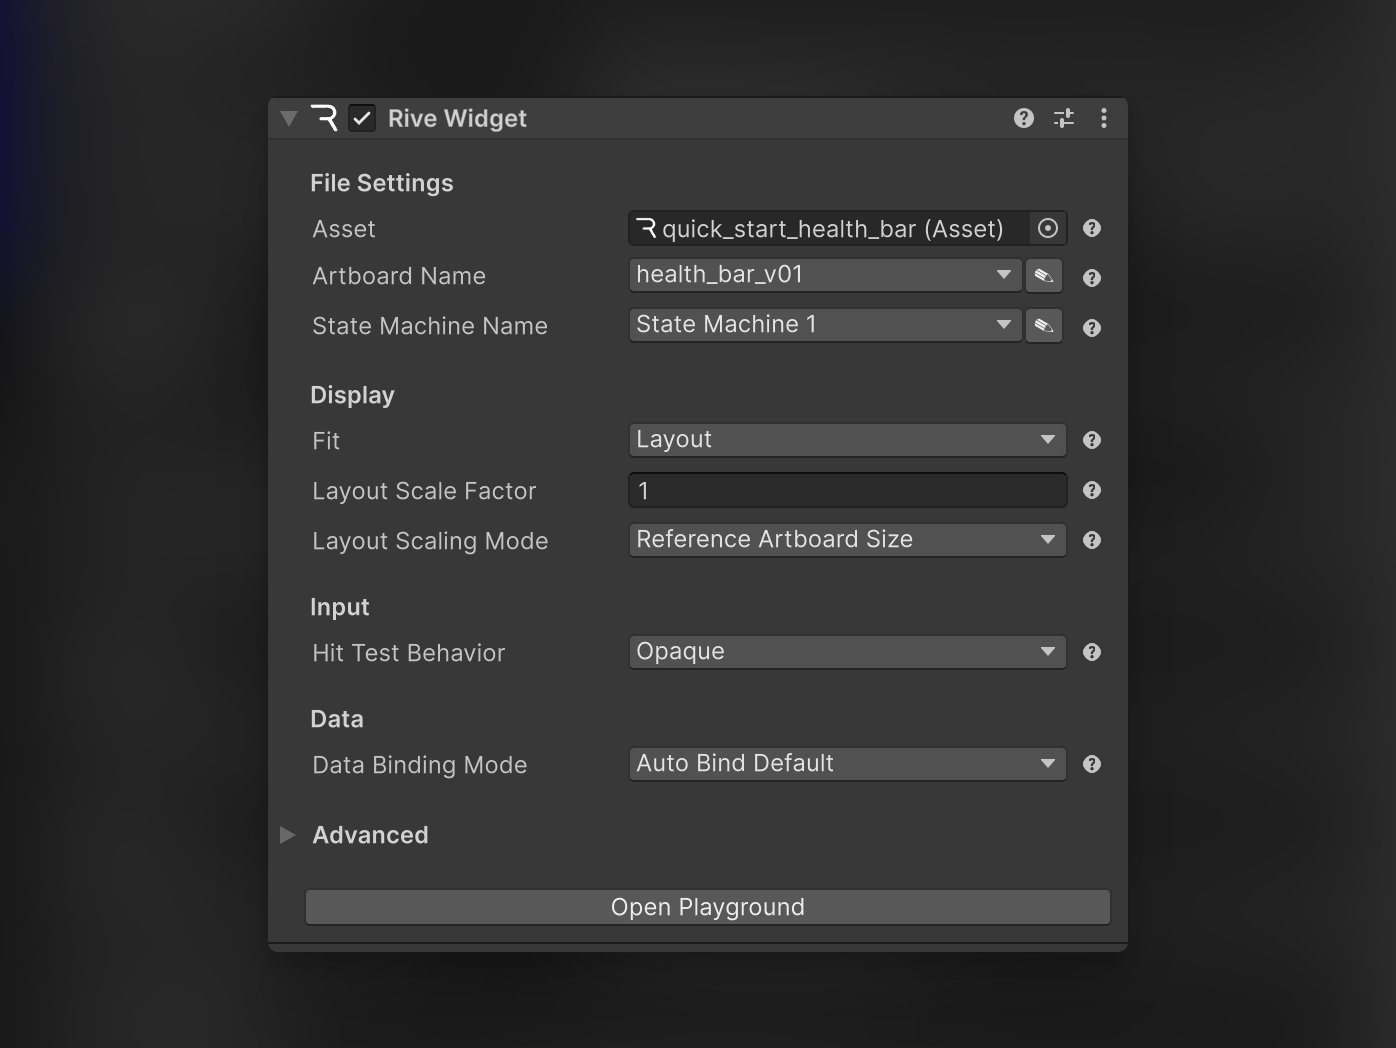
1
Select the correct Artboard Name and State Machine Name for your health bar file.
For this tutorial, the selected artboard name should be
health_bar_v01 and the state machine name should be State Machine 1.2
Set Data Binding Mode to Auto Bind Default.
The demo file was built with responsiveness in mind, so we also set the
Fit mode to Layout to ensure the health bar is scaled to the size of the widget. See Layout to learn more.4. Add the controller script
Create a C# script namedHealthBarController.cs. This is a wrapper script that will be used to control the health bar from your gameplay code.
Why use a wrapper script? Even though you can access Rive view model instance properties anywhere in your project, it’s usually better to keep that logic in one place because:
- It keeps the rest of your code Rive-agnostic: your gameplay scripts can call
Damage()/Heal()without knowing about view models, property names, or widget lifecycle. - It centralizes Rive-specific details: if the Rive file changes (renamed properties, new triggers, different setup), you update one script instead of hunting through your project.
Step 4.1: Set up the basic fields
Start by adding references to the widget and the property names we’ll look up in the Rive file.m_healthPropertyName and m_gameOverPropertyName fields, they refer to the names of the health and gameOver properties in the main view model defined in the Rive file.
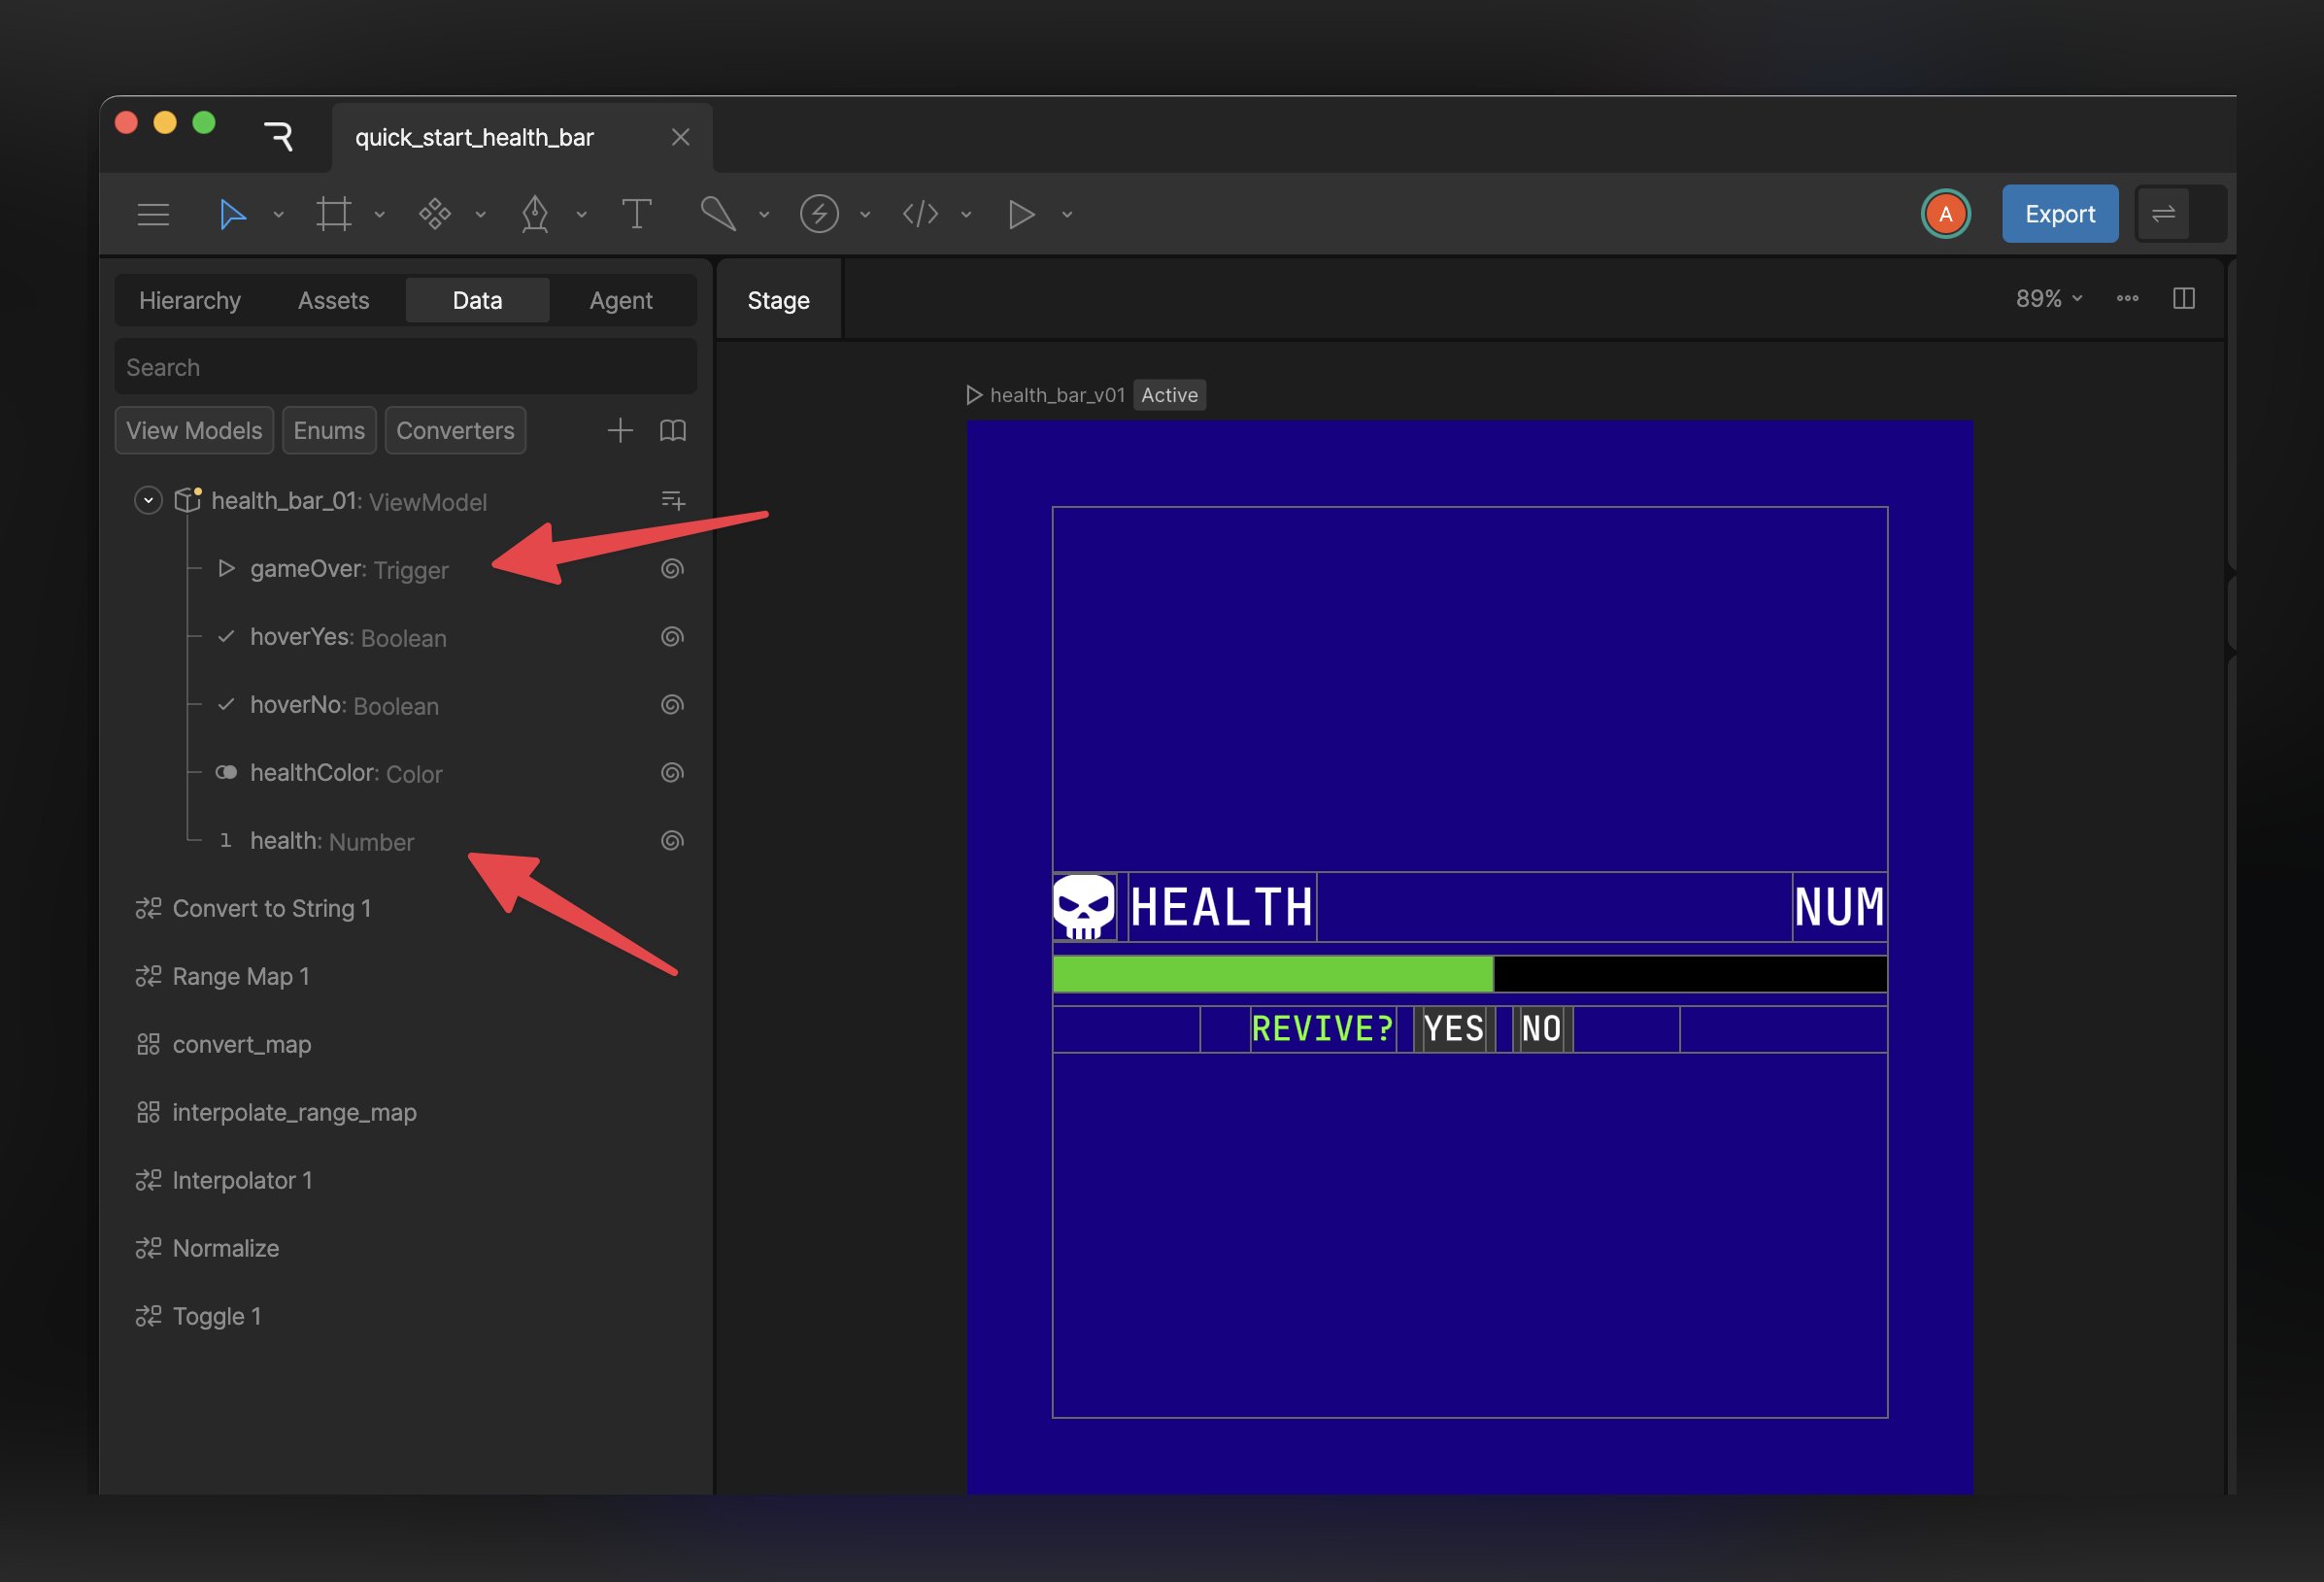
The health bar file in the Rive Editor
Step 4.2: Add events
Add UnityEvents so you can react to health changes and game over events (both in the Inspector and from code).Step 4.3: Grab the view model instance properties when the widget is loaded
We useOnWidgetStatusChanged to access the view model instance once the widget is loaded. If you try to access the view model instance before the widget is loaded, it will be null.
The
OnWidgetStatusChanged callback also provides a safe window to set initial values before the first frame renders, ensuring they’re visible immediately without delay.HealthBarController:
This tutorial file includes a default view model instance. If the widget’s Data Binding Mode was set to Manual or if the file did not have a default view model instance,
m_riveWidget.StateMachine?.ViewModelInstance would be null.In this case, you would need to manually create and bind a new view model instance to the state machine.Learn more about binding modes and how to configure them in the Data Binding documentation.Step 4.4: Expose a simple API for gameplay code
Now we add methods that provide a clean interface for gameplay without having to expose the underlying Rive implementation details. First, add aHealth property that reads from the health view model instance property when available:
5. Set up the controller in the Inspector
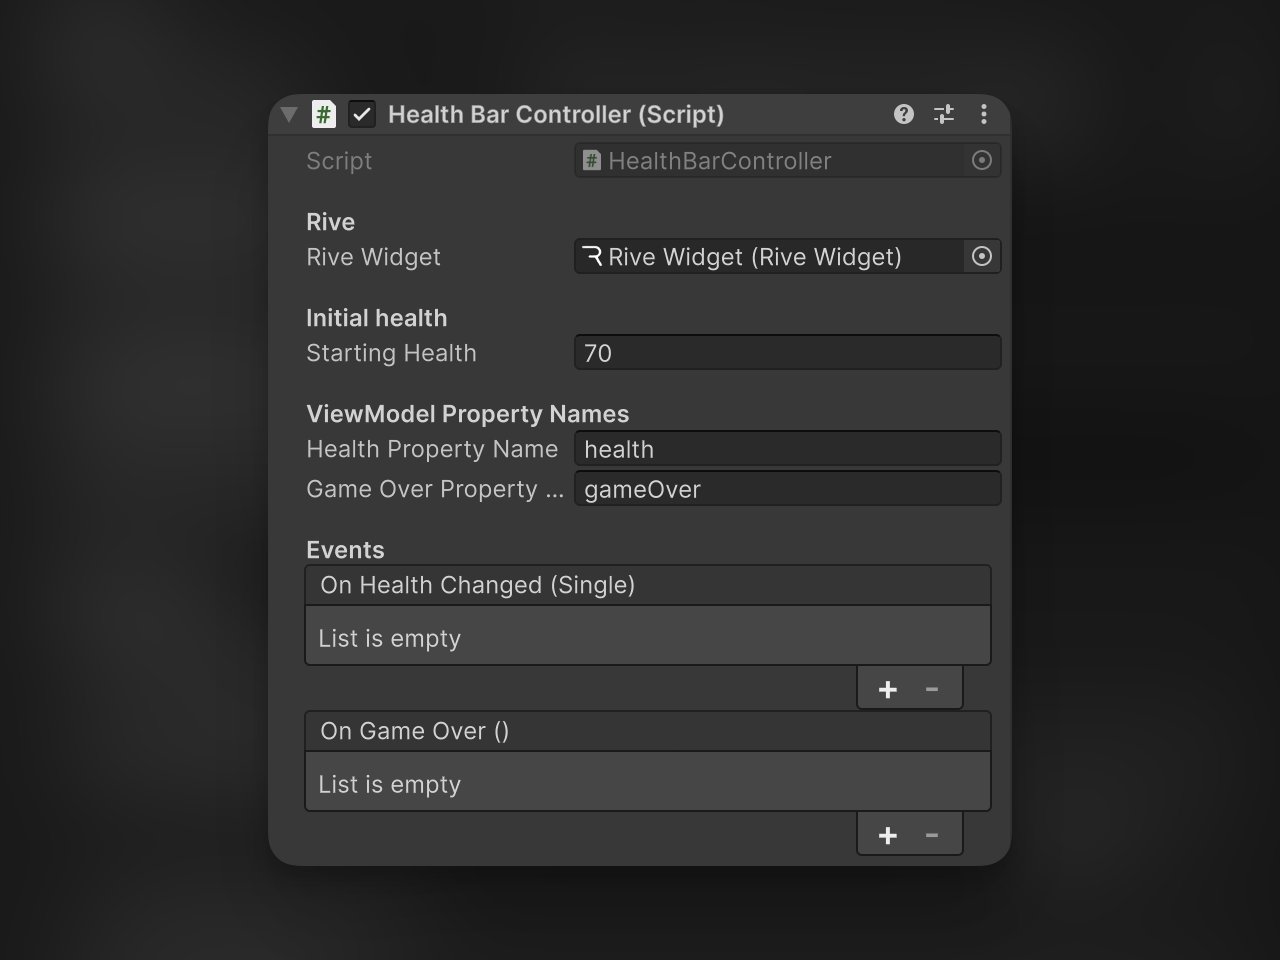
HealthBarController to any GameObject (typically the same object as your Rive Widget), then:
1
Assign the
Rive Widget field to the one you created earlier.2
Set
Starting Health to the initial health value you want to display (for example, 70).3
(Optional) Wire
On Game Over to your own gameplay logic.Optional: keyboard controls
If you want a quick way to test this in Play Mode, you can drive the controller with keyboard input. Create a script namedHealthBarKeyboardControls.cs:
HealthBarKeyboardControls to any GameObject, assign your HealthBarController, then press:
←(left arrow key) to take damage→(right arrow key) to heal
This uses Unity’s Input System package (
com.unity.inputsystem). If your project is still using the legacy input manager, you’ll need to enable the Input System in Unity (Project Settings → Player → Active Input Handling).If the Event System in your scene shows a Replace with InputSystemUIInputModel button in the Inspector, click it to upgrade to the new Input System (otherwise pointer events won’t work with the Rive file).6. Drive health from gameplay code
From your gameplay scripts you can treat the Rive file like a “rendered UI” for your data:- Call
Damage()orHeal()based on gameplay events. - Or read
Healthif you need the current value.
health number and gameOver trigger), you can change the health bar’s appearance in the Rive Editor as much as you want without updating or writing any additional code. Simply swap out the old .riv file with the new one.